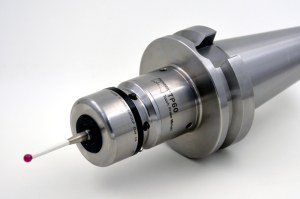
Problems That Should Be Paid Attention to when Calibrating the Touch Trigger Probe
1. The reason why the dynamic diameter of the touch trigger probes is smaller than the static diameter
After learning about the principle of probe calibration, we can easily explain why the dynamic diameter of the probe stylus is smaller than the static diameter.
(1) The measurement touch probe is equivalent to a lever structure in principle. During the touch measuring, the sensor must be able to trigger (equivalent to the switch off) in order to send out a signal. Since the probe stylus (force arm) has a certain length, after the gem ball of the probe stylus touches the standard ball, it has to travel a certain distance to trigger the sensor. The longer the probe stylus, the greater the distance. Therefore, the trigger signal is delayed, so that the diameter of the fitting ball is smaller than the sum of the diameter of the gem ball and the standard ball. When the software subtracts the diameter of the standard ball from the diameter of the fitting ball, the "dynamic diameter" of the calibrated probe stylus we get is smaller than its static diameter.
(2) The probe stylus will be slightly deformed during the touch measuring, which increases the signal delay, which is also one of the reasons for this phenomenon.
(3) The time required for the trigger signal of the sensor (probe) to reach the counter is fixed. However, the rate of change of the grating reading during this time is related to the touch speed of the measuring machine. When the touch speed is fast, the "dynamic diameter" of the probe stylus is small.
2. Problems to be paid attention to when calibrating the touch trigger probe
The calibrated dynamic diameter is smaller than the static diameter, which will not affect the measurement accuracy of the measuring machine. On the contrary, it also compensates for the delay of the contact measurement and the deformation of the probe stylus. Because the ball radius correction of the stylus measuring software used by the measuring machine (converting the coordinates of the ball center point measured by the needle to the coordinates of the contact point) is a dynamic diameter, but not a static diameter. When calibrating the probe, please pay attention to the following issues:
(1) The measuring seat, probe (sensor), extension rod, probe stylus, and standard ball must be installed reliably and firmly, without looseness and gaps. After checking whether the installed stylus and standard ball are firm, wipe the fingerprints and stains on the stylus and standard ball to keep them clean.
(2) The measurement speed during probe calibration should be the same as that during measurement, and automatic measurement methods should be adopted. When using the manual calibration method, attention should be paid to the uniformity of the measurement speed and position. Pay attention to whether there is a big deviation between the corrected stylus diameter and the correction result of the same length before correction, and the shape deviation during correction. If there are obvious changes, find the cause or clean the standard ball and stylus, repeat the correction of 2~3 times, and observe the degree of repetition of the results. Check whether the probe, stylus, and standard ball are firmly installed, and check the working status of the instrument.
(3) When multiple probe angles, positions or different probe lengths are required for calibration, the calibration effect (accuracy) must be checked after calibration. The method is: after calibrating all the defined probes, use the functions of the probe to measure the standard sphere with all the calibrated probes in turn, and observe the change of the center coordinates of the sphere. If there is a change of 1 to 2 meters, it is normal. If it changes a lot, it is necessary to check whether the installation of the base, probe, extension rod, stylus and standard ball is firm. It is an important reason for this phenomenon.
(4) Replace the probe (different software, different methods), because the length of the probe is an important parameter for the automatic calibration of the probe. If there is a deviation in the length of the input probe, it will cause abnormal collision of the probe.
(5) Input the standard ball diameter correctly. It can be seen from the principle of calibrating the probe that the diameter of the standard ball directly affects the calibration value of the diameter of the stylus gem ball. Although this is a "low probability event", it is still possible for beginners.
In summary, it is normal that the dynamic radius of the touch trigger probe is smaller than the static radius, so the surveyor does not need to worry about this. The calibration of the probe is an important part of the measurement process, and the deviation generated will be directly added to the measurement result. When using combined probes (multiple probe angles, multiple probe positions and multiple probe lengths), its calibration accuracy is particularly important, and we must attach great importance to it. When a problem is found, rechecking the results of the probe calibration will waste valuable time and increase a lot of work.
As a probe factory, we can offer kinds of touch probe for sale, if you have needs, please contact us.
Contact : eer Pion, 0451 82285451
Good deal: buying from seller
We invite you to read our terms of use. You can also visit our FAQ section and see our information section on the risks associated with counterfeiting.
|
This page is about importers and exporters of Problems That Should Be Paid Attention to when Calibrating the Touch Trigger Probe Search in a category : Everything else / Bulk Search in a category : probe, attention, calibrating, trigger, problems, paid, touch |
Friday, March 08, 2013
Quantity : 10 - Price : 80,00 €
Origin: China Model Number: V211141 Brand Name: Anilutum Feature: Gender: Men's Material: Style: long-sleeved shirt Online: 9AP-5PM Anilutum Brand Slim Solid Color Long-sleeved Shirt V211141 Aoniludan Anilutum for the British men's top business brand in 2003 from Guangzhou Ming...
H&Y International Fashion Limited
- anilutum
- EC1V 2NX - London
- +86 13724036041
Thursday, December 17, 2015
Quantity : 5000 tons - Price : 90EUR
We are direct manufacturer and main supplier of European standard Wood Pellet 6mm, 8mm with Moisture content: <7% and Calorific value: <4.7kWh/kg.<br /> SPECIFICATION FOR WOOD PELLETS: 1. Application: House Heating 2. Made From: Compacted Sawdust 3. Shape: Stick 4...
ECO ENERG LEMN SA
- 437.080 - Maramures
- 262370937
Monday, March 25, 2013
Quantity : 12 - Price : 62,00 €
Importer or sell lots sanzas carimbas: 12 cm diameter metal keys face exotic wood bottom half coconut. Very good sound. Sold in packs of 25 pieces: 62,50 € the lot is 2,50 € per piece. Minimum purchase a lot. If this proposal please, just send me an e-mail confirmation stating the...
OUTRE MERS
- outremers
- 17110 - SAINT GEORGES DE DIDONNE
- +33 6 81 16 68 53


